
Tommee Tippee Bottle Warmer Instruction Manual: A Comprehensive Guide (Updated 04/21/2026)

GoodtoKnow reports impressive defrosting and warming speeds for frozen breastmilk pouches‚ highlighting the convenience for parents like Margot’s mum‚ Lauren Godfrey.

Tommee Tippee bottle warmers are designed to provide a safe‚ quick‚ and convenient way to prepare milk for your baby. Recognizing the demands of modern parenthood‚ these warmers aim to simplify feeding routines‚ whether using breast milk or formula. As highlighted by GoodtoKnow‚ the speed and efficiency – particularly in defrosting and warming frozen breast milk – are significant benefits for parents.
These devices offer more than just warming; many models incorporate sterilization functions‚ adding to their versatility. Understanding your specific Tommee Tippee model is crucial‚ as features and operation can vary. This guide will walk you through everything from initial setup and safe operation to troubleshooting and maintenance‚ ensuring you can confidently provide your little one with perfectly warmed nourishment every time. Prioritizing safety and preserving essential nutrients are key considerations.
Understanding Different Tommee Tippee Bottle Warmer Models
Tommee Tippee offers a range of bottle warmers‚ each designed with specific features to cater to diverse needs. Core models typically focus on warming and may include preset options for milk and baby food. Advanced models often integrate sterilization capabilities‚ providing a 2-in-1 solution for hygiene and convenience. Some feature digital displays and customizable temperature settings for precise control.
It’s important to identify your specific model number‚ usually found on the base of the unit‚ to access the correct instructions. Variations exist in warming times and water level requirements. While GoodtoKnow emphasizes the speed of warming‚ this can differ based on the model and milk volume. Referencing your model’s dedicated manual ensures optimal performance and safety‚ maximizing the benefits of your chosen warmer.
Safety Precautions & Warnings
Always unplug the bottle warmer before cleaning or performing maintenance. Never immerse the base unit in water or any other liquid‚ as this poses a serious electrical hazard. Exercise extreme caution when handling warmed bottles or pouches to avoid burns; contents may be hotter than they appear. Regularly inspect the power cord for damage and discontinue use if any fraying or exposure of wires is detected.
Do not operate the warmer if it’s damaged in any way. Ensure the bottle warmer is placed on a stable‚ heat-resistant surface away from flammable materials. Never leave the warmer unattended while in operation. Keep out of reach of children. As highlighted by user experiences‚ rapid warming is a feature‚ but always test the temperature before feeding your baby to prevent scalding.
Components of the Bottle Warmer
The Tommee Tippee Bottle Warmer typically includes a main base unit housing the heating element and control panel. A removable inner jug is central‚ designed to hold the water used for warming. Many models feature a bottle/pouch holder‚ accommodating various sizes and types of baby bottles and breast milk storage pouches. Some advanced models include a detachable defrosting rack‚ specifically for frozen breast milk.
The control panel usually consists of buttons for selecting warming functions – milk‚ formula‚ or baby food – and adjusting temperature settings. An easy-to-read digital display indicates the warming cycle progress. Crucially‚ ensure all components are present and undamaged before initial use. Refer to your specific model’s diagram for precise component identification.

Setting Up Your Tommee Tippee Bottle Warmer
Before first use‚ thoroughly familiarize yourself with all components and functions to ensure safe and effective operation for your little one’s nourishment.
Initial Cleaning and Preparation
Prior to the very first use of your Tommee Tippee bottle warmer‚ a meticulous cleaning process is absolutely essential. Begin by carefully unpacking all components and removing any protective packaging materials. Wash the warmer’s interior‚ the bottle stand (if included)‚ and the exterior surfaces with warm‚ soapy water.
Ensure you use a mild dish soap and a soft sponge or cloth to avoid scratching the surfaces. Rinse thoroughly under clean‚ running water‚ making certain no soap residue remains. Pay particular attention to any crevices or hard-to-reach areas where residue might accumulate.
After rinsing‚ allow all parts to air dry completely before assembling and using the warmer. This initial cleaning step helps eliminate any manufacturing residues and prepares the device for safe and hygienic use with your baby’s bottles and food.
Water Level Guidelines – Crucial for Safe Warming
Maintaining the correct water level within your Tommee Tippee bottle warmer is paramount for both effective warming and‚ crucially‚ safety. Always refer to the specific markings inside your warmer model‚ as levels vary. Generally‚ there are minimum and maximum fill lines indicated.
For smaller bottles (typically 4oz/125ml)‚ use the minimum water level. Larger bottles (8oz/250ml or more) require a higher water level‚ approaching the maximum line. Never operate the warmer without sufficient water‚ as this can cause damage and pose a safety hazard.
Conversely‚ exceeding the maximum fill line can lead to spillage during operation. Regularly check the water level before each use and top up as needed with clean‚ cool water. Consistent adherence to these guidelines ensures optimal performance and prevents potential risks.
Powering On and Basic Operation
To power on your Tommee Tippee bottle warmer‚ ensure it’s correctly plugged into a functioning power outlet. Most models feature a simple on/off switch or a single button for operation. Pressing this initiates the warming cycle.
The warmer typically displays a light indicator to confirm it’s active. Select your desired warming function – milk‚ formula‚ or defrost – using the corresponding buttons. Some models offer adjustable temperature settings; consult your specific model’s guide.
Once the function is selected‚ place the prepared bottle into the warmer. The warmer will automatically shut off when the warming cycle is complete‚ signaling with an audible beep or light change. Always check the bottle temperature before feeding.
Warming Baby Bottles
Proper warming is crucial for baby’s comfort and safety; Tommee Tippee warmers offer tailored settings for milk‚ formula‚ and breastmilk‚ ensuring optimal temperatures.
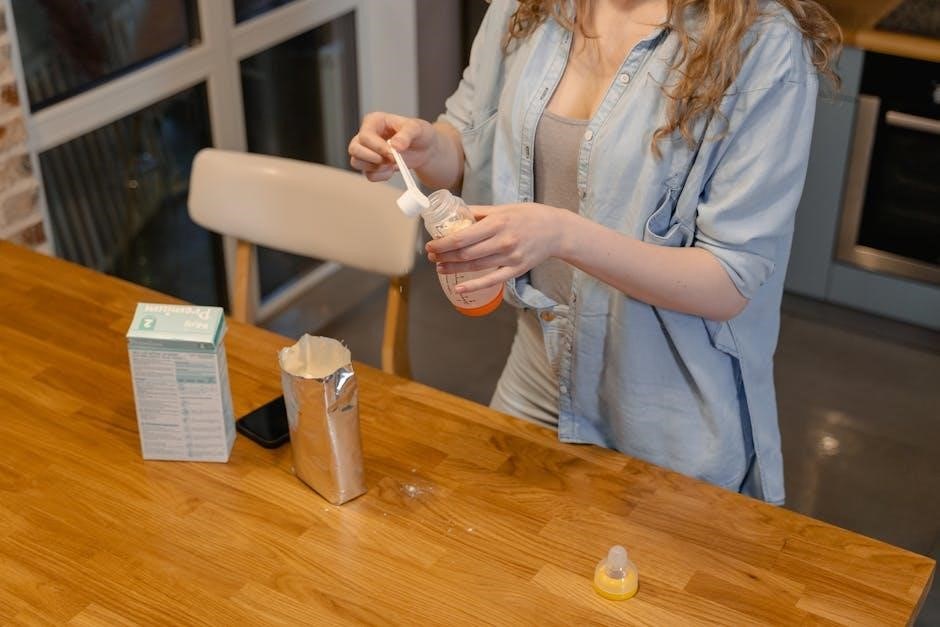
Warming Milk – Step-by-Step Instructions
Begin by ensuring your Tommee Tippee bottle warmer is clean and filled with the appropriate water level‚ as detailed in the ‘Water Level Guidelines’ section. Gently pour the desired amount of milk into a compatible Tommee Tippee bottle.
Place the bottle securely into the warmer‚ ensuring it’s properly seated. Select the ‘Milk’ warming setting on your model. If your warmer has volume settings‚ choose the closest match to the amount of milk you’re warming.
Press the start button and allow the warmer to complete the cycle. The warmer will automatically shut off when finished. Carefully remove the bottle – it may be warm! Always test the temperature by shaking gently and applying a few drops to your wrist before feeding. Avoid overheating‚ as this can destroy vital nutrients and potentially scald your baby.
Warming Breast Milk – Preserving Nutrients
Warming breast milk requires extra care to protect its delicate antibodies and nutritional components. Always use the ‘Breast Milk’ setting on your Tommee Tippee warmer‚ if available‚ as it utilizes a gentler warming cycle.
Avoid high temperatures; aim for lukewarm‚ around body temperature (98.6°F or 37°C). Overheating can diminish the immunological benefits of breast milk. Ensure the water level is correct‚ following the guidelines in the manual‚ to prevent uneven heating.
Gentle swirling after warming helps redistribute temperature evenly. Never microwave breast milk‚ as it creates hot spots and destroys nutrients. Always test the temperature on your wrist before feeding.
For previously frozen breast milk‚ utilize the ‘Defrost’ setting first‚ followed by the ‘Breast Milk’ warming cycle. Proper warming preserves the quality and benefits for your baby.
Warming Formula – Correct Temperatures
Warming formula isn’t necessary‚ but some babies prefer it. If warming‚ consistency is key. Use the ‘Formula’ setting on your Tommee Tippee warmer‚ if equipped‚ for a controlled temperature rise. Avoid overheating‚ as this can destroy vital nutrients present in the formula.
Ideal formula temperature should be body temperature (around 98.6°F or 37°C). Always test the temperature on your wrist before feeding your baby. Never microwave formula‚ as uneven heating can create dangerously hot spots.
Proper water levels‚ as detailed in the manual‚ are crucial for safe and even warming. Gently swirl the bottle after warming to distribute the heat. Discard any leftover warmed formula after a feeding; do not re-warm it.
Always prepare formula according to the manufacturer’s instructions before warming.

Specialized Warming Functions
Tommee Tippee warmers offer defrosting‚ sterilization‚ and baby food warming capabilities‚ providing versatile options beyond simple bottle warming for parental convenience.
Defrosting Breast Milk – Utilizing the Defrost Setting
The Tommee Tippee bottle warmer’s defrost function is specifically designed for gently thawing frozen breast milk‚ preserving vital nutrients often lost during other thawing methods. GoodtoKnow highlights the impressive speed of this process‚ a significant benefit for busy parents.
To utilize the defrost setting‚ ensure the warmer is filled with the appropriate water level (refer to the ‘Water Level Guidelines’ section). Select the ‘Defrost’ option on your model‚ and input the volume of breast milk being thawed.
The warmer will circulate the water gently‚ ensuring even thawing without overheating. Regularly check the milk’s consistency; avoid re-freezing thawed breast milk. Always follow safe breast milk handling guidelines‚ and use within 24 hours of complete thawing.
Sterilizing Function – A 2-in-1 Benefit
Many Tommee Tippee bottle warmer models offer a convenient 2-in-1 functionality: sterilization. This feature eliminates the need for a separate sterilizer‚ saving counter space and streamlining baby care routines; The steam sterilization process effectively kills harmful bacteria‚ ensuring your baby bottles and accessories are hygienically clean.
To sterilize‚ place clean bottles and components inside the warmer‚ adding the specified amount of water as indicated in the manual. Select the ‘Sterilize’ setting‚ and the warmer will generate steam to thoroughly sanitize the items.
Allow the cycle to complete fully before removing items‚ as they will be hot. Always refer to your specific model’s instructions for sterilization times and safety precautions. Regular sterilization is crucial‚ especially for newborns and infants with developing immune systems.
Warming Baby Food – Purees and Jars
Tommee Tippee bottle warmers aren’t just for milk; they can gently warm baby food purees and jars‚ ensuring a comfortable temperature for your little one. When warming purees‚ always transfer them to a Tommee Tippee food container or a microwave-safe bowl. Never heat food directly in the jar.
Add water to the warmer according to the guidelines‚ and select the ‘Baby Food’ setting if available. If not‚ use the lowest warming setting and check the temperature frequently. Stir the food thoroughly to distribute heat evenly and eliminate any cold spots.
Always test the temperature before feeding – it should be lukewarm‚ not hot. Be cautious‚ as baby food can heat up quickly. Consistent temperature is key for a pleasant feeding experience.

Troubleshooting Common Issues
Addressing problems with your Tommee Tippee warmer is crucial; issues like no heating or uneven warming require careful attention and review of the manual.
Bottle Warmer Not Heating
If your Tommee Tippee bottle warmer isn’t heating‚ begin with the basics: ensure the unit is securely plugged into a functioning power outlet. A simple test with another appliance can confirm outlet functionality. Next‚ verify the power button has been firmly pressed and the warmer is actually switched on – sometimes a quick re-press is needed.
Check the water level; insufficient water prevents proper operation and may trigger a safety shut-off. Refer to the ‘Water Level Guidelines’ section for appropriate amounts. Inspect the heating element visually (when cool and unplugged) for any signs of damage or mineral buildup. If descaling is needed‚ follow the ‘Descaling the Bottle Warmer’ instructions.
Finally‚ if the issue persists‚ consult the full instruction manual for model-specific troubleshooting steps or contact Tommee Tippee customer support for assistance. Do not attempt to disassemble or repair the unit yourself.

Uneven Warming – Identifying the Cause
Experiencing uneven warming with your Tommee Tippee bottle warmer? Several factors could be at play. Firstly‚ ensure the bottle is correctly positioned within the warmer; it should be centered and making full contact with the heating plate. Incorrect placement hinders consistent heat distribution.
Water level is crucial – too little water can lead to localized heating‚ while too much may dilute the warming effect. Always adhere to the guidelines in the ‘Water Level Guidelines’ section. Bottle type also matters; wider-necked bottles or those with thick glass may warm differently.
Finally‚ consider the initial milk temperature. Extremely cold milk will naturally take longer to warm evenly. Stirring the milk gently mid-cycle can help distribute heat. If problems continue‚ review the manual or contact Tommee Tippee support.
Error Messages and Their Meanings
Your Tommee Tippee bottle warmer utilizes error messages to indicate potential issues. A flashing “E1” typically signals a sensor malfunction – discontinue use and contact customer support immediately. “E2” often indicates an empty water reservoir; refill to the minimum level and restart the warming cycle.
If you encounter “E3”‚ it suggests the warmer has overheated. Unplug the device‚ allow it to cool completely‚ and then try again. A persistent “E4” message points to a power supply problem; check the outlet and power cord connection.
Consult the full error code list within the instruction manual for a comprehensive understanding of each message. Ignoring error codes can lead to damage or unsafe operation. Always prioritize safety and seek assistance if unsure.

Cleaning and Maintenance
Regular cleaning prevents mineral buildup and ensures optimal performance. Daily rinsing and periodic descaling‚ as outlined in the manual‚ are crucial for longevity.
Daily Cleaning Procedures
After each use‚ it’s essential to thoroughly clean your Tommee Tippee bottle warmer to maintain hygiene and prevent the buildup of milk residue. Begin by unplugging the warmer and allowing it to cool completely. Remove the bottle stand and any detachable parts.
These components can be washed with warm‚ soapy water‚ ensuring all traces of milk are removed. Rinse thoroughly under clean running water. The interior of the warmer itself should be wiped down with a damp cloth‚ avoiding abrasive cleaners that could damage the surface.
Never immerse the main warmer unit in water. Ensure all parts are completely dry before reassembling and storing. Consistent daily cleaning will contribute significantly to the longevity and safe operation of your bottle warmer‚ safeguarding your baby’s health.
Descaling the Bottle Warmer – Preventing Mineral Buildup
Over time‚ mineral deposits from water can accumulate inside your Tommee Tippee bottle warmer‚ potentially affecting its performance and lifespan. Regular descaling is crucial to prevent this. The frequency depends on your water hardness – typically every 3-6 months.
Mix a descaling solution (citric acid-based is recommended) with water‚ following the solution’s instructions. Pour the mixture into the warmer‚ ensuring it covers the heating element. Run a warming cycle (without a bottle) for approximately 15-20 minutes.
Allow the solution to sit for another 30 minutes before emptying and rinsing the warmer thoroughly with clean water‚ repeating several times to remove all traces of the descaling agent. This process ensures optimal performance and prevents damage.
Long-Term Storage Instructions
If you plan to store your Tommee Tippee bottle warmer for an extended period‚ proper preparation is essential to maintain its functionality. Begin by ensuring the unit is completely dry‚ both inside and out; Remove any remaining water from the reservoir and wipe down all surfaces with a soft‚ dry cloth.
Store the warmer in its original packaging‚ if possible‚ or in a clean‚ dry location away from direct sunlight and extreme temperatures. Avoid storing it in damp environments like basements or garages. Ensure the power cord is neatly coiled and stored separately to prevent damage.
Periodically check the stored unit for any signs of deterioration. Before reuse‚ inspect the cord for fraying and thoroughly clean the warmer before operation.

Advanced Features & Tips
Maximize efficiency by experimenting with warming times for different bottle volumes and types‚ ensuring optimal temperature and preserving essential nutrients effectively.
Using with Different Bottle Types
Tommee Tippee bottle warmers are designed with versatility in mind‚ accommodating a wide range of bottle types and sizes. However‚ achieving optimal warming performance requires understanding how different materials and shapes interact with the warmer’s technology.
Wide-neck bottles generally warm more evenly due to increased contact with the water or steam. For smaller‚ standard-neck bottles‚ ensure they are centered within the warmer to promote consistent heating. Bottles constructed from thicker plastic may necessitate slightly longer warming times compared to those made from thinner materials.
Always refer to the bottle manufacturer’s guidelines regarding maximum temperature tolerances. It’s crucial to avoid overheating‚ especially with plastic bottles‚ to prevent potential leaching of chemicals. Regularly check the water level and adjust warming times based on the bottle’s volume and material for consistently safe and effective warming.
Optimizing Warming Times for Various Volumes
Achieving the perfect temperature relies on adjusting warming times to the volume of milk or formula. Tommee Tippee warmers offer pre-set options‚ but understanding manual adjustments is key. For smaller volumes (2-4oz)‚ begin with the shortest setting and incrementally increase if needed‚ checking frequently.
Mid-range volumes (5-8oz) typically benefit from the medium setting‚ while larger bottles (9oz+) require the longest setting or a combination of settings. Remember that starting temperatures – whether from refrigerated or frozen – significantly impact warming duration.
Always test the temperature before feeding by shaking gently and applying a few drops to your wrist. Consistent monitoring and slight adjustments based on your specific warmer and bottle combination will ensure a comfortably warm‚ safe feed every time.