
Drill Charging Station Plans: A Comprehensive Guide
Detailed drill charging station plans in PDF format are readily available online, offering step-by-step instructions for a simple yet effective shop project.
These plans ensure a streamlined build, providing clarity for woodworking enthusiasts of all skill levels, and are sourced from DIY Montreal.
Drill charging stations represent a practical solution for organizing and maintaining cordless drills and their batteries within a workshop environment. These stations, often built from readily available materials using drill charging station plans PDF downloads, address the common issue of scattered tools and discharged batteries.
The core concept revolves around a dedicated space designed to house drills, chargers, and multiple batteries, ensuring they are always readily accessible and powered up. DIY Montreal provides accessible plans, while communities like r/BeginnerWoodWorking offer support.
These plans typically outline a build that measures approximately 24″W x 15″H x 12″D, offering ample space for organization. The convenience of a centralized charging hub significantly improves workshop efficiency and promotes a tidier workspace, ultimately enhancing productivity.
Why Build a Drill Charging Station?
Constructing a drill charging station, guided by readily available drill charging station plans PDF, solves several common workshop frustrations. It eliminates the time wasted searching for misplaced drills or dead batteries, boosting overall efficiency. A dedicated station consolidates charging, potentially utilizing a single power strip plugged into one outlet, simplifying power management.
Furthermore, a well-organized station protects valuable tools and batteries from damage. Utilizing plans from sources like DIY Montreal ensures a structured build; The ability to customize the station with dividers and expanded storage, as detailed in premium plans, caters to individual needs.
Ultimately, building a charging station isn’t just about organization; it’s about investing in a more productive and enjoyable workshop experience, supported by a thriving community like r/BeginnerWoodWorking.
Benefits of a Dedicated Charging Station
Employing drill charging station plans PDF unlocks numerous advantages for workshop organization and tool management. A central location for drills and batteries drastically reduces search time, increasing productivity. Utilizing a power strip within the station streamlines charging, avoiding outlet clutter and simplifying power control.
Beyond convenience, a dedicated station protects your investment. Batteries are stored safely, minimizing potential damage, and tools remain readily accessible. Detailed plans, often including options for dividers, allow for customized organization, maximizing space and efficiency.
Access to resources like DIY Montreal and the support of communities like r/BeginnerWoodWorking further enhance the benefits, providing guidance and inspiration throughout the build process.

Planning Your Drill Charging Station
Drill charging station plans PDF facilitate a well-organized build, typically around 24″W x 15″H x 12″D, requiring careful material selection and tool preparation.
Determining Station Dimensions (24″W x 15″H x 12″D)
Utilizing drill charging station plans PDF begins with understanding the optimal dimensions. The standard design measures approximately 24 inches wide, 15 inches tall, and 12 inches deep, providing ample space for multiple drills and batteries.
These dimensions are a starting point; adjustments can be made based on your specific tool collection and available workshop space. However, this size generally accommodates most cordless drill setups effectively. The plans themselves will detail how these measurements translate into individual wood piece sizes for cutting.
Consider the footprint within your workshop and ensure sufficient clearance around the station for easy access and maneuverability. A well-planned size prevents overcrowding and promotes efficient tool organization, maximizing the benefits of your new charging and storage solution.
Material Selection: Wood Types & Considerations
Drill charging station plans PDF often don’t specify a single wood type, allowing for customization based on budget and aesthetic preference. Pine is a cost-effective and readily available option, suitable for beginners. However, hardwoods like maple or oak offer increased durability and a more premium finish.
Plywood is another viable choice, providing stability and affordability. Consider the thickness of the wood – ¾ inch is generally recommended for structural integrity. When selecting materials, ensure they are dry and free of warping to prevent issues during assembly.
The plans may suggest specific wood thicknesses for different components. Prioritize materials that can withstand the weight of drills and batteries, ensuring a long-lasting and robust charging station.
Tools Required: Essential Power Tools
Successfully executing drill charging station plans PDF necessitates a few key power tools. A circular saw or table saw is crucial for accurately cutting the wood pieces to the specified dimensions. A Kreg Jig (pocket hole jig) is highly recommended for creating strong and concealed joints, simplifying the assembly process.
A power drill/driver is indispensable for drilling pilot holes and driving screws. A Kreg Rip Cut or straight edge guide can enhance the precision of your cuts with the circular saw. Basic safety gear, including safety glasses and hearing protection, is also essential.
Reviewing the plans will confirm the exact tool requirements, but these represent the core tools needed to bring your charging station to life.

Circular Saw/Table Saw
When utilizing drill charging station plans PDF, a circular saw or table saw is fundamental for precise wood cutting. These saws enable you to accurately cut the wood pieces required for the station’s frame, dividers, and other components, adhering to the plan’s specified dimensions.
While a table saw offers enhanced precision and control, a circular saw provides greater portability and is suitable for smaller projects. Familiarity with safe operating procedures is paramount when using either tool. Resources are available online demonstrating proper circular saw techniques.
Consider a Kreg Rip Cut or straight edge guide to further improve cut accuracy, especially with a circular saw. Accurate cuts are vital for a professional-looking and structurally sound charging station.
Kreg Jig (Pocket Hole Jig)
Implementing drill charging station plans PDF often involves using a Kreg Jig, also known as a pocket hole jig, for strong and concealed wood joinery. This tool creates angled holes allowing screws to pull the wood pieces tightly together, resulting in a robust frame and secure dividers.

The Kreg 720 model is a popular choice, but selecting the right jig depends on your project needs and budget. Pocket hole joinery simplifies assembly, eliminating the need for complex joinery techniques. It’s particularly useful for constructing the station’s frame and attaching dividers.
Refer to resources detailing how to use a Kreg Jig effectively to ensure accurate hole placement and secure connections, contributing to a durable and professional finish.
Power Drill/Driver
A power drill/driver is indispensable when executing drill charging station plans PDF, serving multiple crucial functions throughout the build process. It’s essential for drilling pilot holes, which prevent wood splitting when screwing pieces together, and for driving the screws themselves to assemble the station’s frame and secure the dividers.
Understanding how to effectively use a drill is paramount; resources are available online demonstrating proper techniques. The drill will also be needed for mounting components and potentially for creating any necessary modifications to the plans.
Ensure you have appropriate drill bits for both pilot holes and screw driving, contributing to a smooth and efficient construction experience.
Obtaining Drill Charging Station Plans (PDF Format)
Drill charging station plans in PDF format are easily accessible for immediate download, enabling you to begin your woodworking project promptly. A primary source for these plans is DIY Montreal, offering a comprehensive guide with step-by-step instructions.
These digital plans detail every aspect of the build, from material lists and cutting diagrams to assembly procedures. The PDF format ensures clarity and ease of use, allowing you to print or view the plans on any device.
The plans provide all necessary dimensions and guidance, making the project manageable for both beginner and experienced woodworkers.

Construction Process: Step-by-Step Guide
Following the PDF plans, begin by precisely cutting the wood pieces, then assemble the station frame using a Kreg Jig for secure pocket hole joinery.
Cutting the Wood Pieces
The drill charging station plans PDF details precise wood dimensions for a 24″W x 15″H x 12″D structure. Utilizing a circular saw or table saw, carefully cut each piece according to the plan’s specifications. Accuracy is crucial for a seamless assembly.
Consider using a Kreg Rip Cut or Straight Edge Guide alongside your circular saw for consistently straight cuts, especially if a table saw isn’t available. The plans will outline the number and size of each board needed – ensuring you have enough scrap material is beneficial. Double-check measurements before each cut to minimize waste and ensure proper fit during assembly.
Remember to prioritize safety when operating power tools; always wear appropriate eye and ear protection.
Assembling the Station Frame
Following the drill charging station plans PDF, begin assembling the station’s frame. A Kreg Jig (pocket hole jig) is highly recommended for creating strong, concealed joints. Drill pocket holes at the designated locations on the wood pieces, as indicated in the plans.
Apply wood glue to the joining surfaces and clamp the pieces together securely. Drive screws into the pocket holes to fasten the frame components. Ensure the frame is square and level during this process. The plans will illustrate the correct order of assembly and screw placement.
A power drill/driver is essential for this step, providing the necessary torque and control. Allow the glue to dry completely before proceeding to the next stage.
Installing Dividers for Tool Organization
Referring to the drill charging station plans PDF, cut the dividers according to the specified dimensions. Typically, four dividers are used for the top section, though the plans allow for customization based on desired tool division space or station width.
Mark the locations for the dividers within the assembled frame, ensuring even spacing and alignment. Drill pilot holes at these marked points to facilitate easy and accurate screw installation. Apply wood glue to the edges of the dividers before inserting them into the frame.
Secure the dividers using screws, ensuring they are firmly attached and perpendicular to the frame. This creates organized compartments for drills, batteries, and other accessories.
Drilling Pilot Holes for Mounting
Following the drill charging station plans PDF, carefully mark the desired mounting locations on the station’s frame. These locations will determine where the station is secured to a wall or other surface.
Using a drill bit slightly smaller than the screws you’ll be using for mounting, drill pilot holes at each marked location. Pilot holes prevent the wood from splitting and make screw insertion significantly easier. Ensure the drill bit is perpendicular to the surface for a clean, straight hole.
Consider the weight of the station and the items it will hold when choosing screw size and mounting locations for optimal stability and safety.

Electrical Components & Safety
The drill charging station plans PDF emphasize selecting a suitable power strip and prioritizing safe wiring practices for reliable and secure charging of your tools.
Choosing a Power Strip
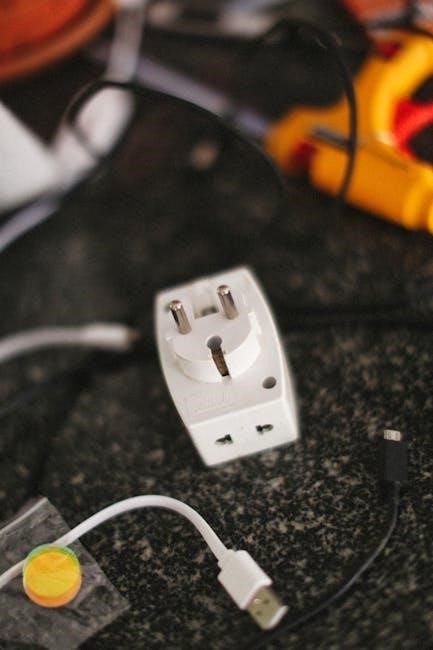
The drill charging station plans PDF highlights the importance of a quality power strip for consolidating charging needs. A single power strip allows multiple drill batteries and tools to charge from one outlet, decluttering your workspace and simplifying power management.
Consider a power strip with surge protection to safeguard your valuable tools from electrical spikes. Look for models with sufficient outlets to accommodate your current and future charging requirements.
Ensure the power strip is rated for the total wattage of all devices you intend to connect. Prioritize safety by choosing a strip with a robust build and a clear on/off switch. Proper power strip selection, as detailed in the drill charging station plans PDF, is crucial for a functional and safe charging setup.
Wiring Considerations & Safety Precautions
The drill charging station plans PDF emphasizes prioritizing electrical safety throughout the build. Always disconnect power before working with any wiring. Avoid overloading the chosen power strip; calculate the total wattage of all connected devices and ensure it remains within the strip’s capacity.
Inspect all cords for damage before use, replacing any frayed or cracked wires immediately. Consider using cord management solutions to prevent tripping hazards and maintain a tidy workspace.
If you’re uncomfortable with electrical work, consult a qualified electrician. Following the drill charging station plans PDF’s safety guidelines is paramount to prevent electrical shocks and potential fire hazards, ensuring a secure charging environment for your tools.
Cord Management Solutions
Effective cord management is crucial when implementing the drill charging station plans PDF. Tangled cords create hazards and clutter. Consider incorporating cable ties, cord sleeves, or dedicated channels within the station’s design to neatly organize charging cables.
Strategically placed hooks or clips can prevent cords from falling to the floor. Utilizing a power strip with built-in cord wraps offers a convenient all-in-one solution.
The drill charging station plans PDF encourages planning cord routing during assembly to minimize visible wires. A tidy setup not only improves aesthetics but also enhances safety and accessibility, making your workshop more efficient and organized.

Advanced Features & Customization
Drill charging station plans PDF can be enhanced with CNC files for automated cutting, or upgraded with premium 18×24 shop drawings for detailed builds.
Adding CNC Files for Automated Cutting
Utilizing CNC files alongside your drill charging station plans PDF dramatically streamlines the wood cutting process, offering precision and efficiency. These files, often included as an upgrade with certain plan purchases, translate the design directly into instructions your Computer Numerical Control machine can understand.
This eliminates the need for manual measurements and cuts, reducing errors and saving significant time, especially for complex designs or if you plan to build multiple stations. The plans now include these files, allowing for automated fabrication of the station’s components.
CNC cutting ensures consistent results, perfect for repeatable projects, and opens the door to more intricate designs than might be achievable with hand tools alone. It’s a fantastic option for those looking to combine traditional woodworking with modern technology.
Premium Shop Drawings (18×24 Print Format)
Enhance your drill charging station plans PDF experience with the availability of premium shop drawings in a large 18×24 print format. These detailed drawings offer a significantly improved visual representation compared to standard 8.5×11 prints, providing greater clarity and ease of use during construction.
The larger format allows for easier reading of dimensions, intricate details, and assembly instructions, minimizing errors and streamlining the building process. They serve as a valuable companion to the digital plans, offering a tangible reference point throughout the project.
These premium drawings are supplemental to the standard plans, offering an extra layer of support for builders seeking maximum precision and a more enjoyable construction experience.
Expanding Storage Capacity
Utilizing your drill charging station plans PDF as a foundation, consider expanding the storage capacity to accommodate a growing tool collection. The basic plan allows for customization; adding extra dividers within the top section is a simple modification.
You can tailor the number of divisions to suit your specific needs, creating dedicated spaces for drill bits, drivers, and other accessories. Increasing the station’s width during the initial build also provides more division space.
Think vertically – adding shelves above the charging area can further maximize storage. Adapting the plans to include drawers offers concealed storage for smaller items, keeping your workshop organized and efficient.

Resources & Community
Downloadable drill charging station plans (PDF) are available from DIY Montreal, while r/BeginnerWoodWorking offers a supportive community for project assistance and advice.
DIY Montreal: Plan Source
DIY Montreal stands as a premier source for acquiring comprehensive drill charging station plans in convenient PDF format. Their offerings cater specifically to woodworking enthusiasts seeking a manageable and rewarding shop project. The plans themselves are meticulously designed, providing clear, step-by-step instructions to guide builders through each phase of construction, from initial material selection to final assembly.

You can directly access and purchase these plans through their website, ensuring a secure and straightforward transaction. Beyond the standard PDF, DIY Montreal also provides options for printed plans, including an 8.5 x 11 format and a larger, premium 18 x 24 print of supplemental shop drawings for enhanced detail; This makes the plans accessible regardless of your preferred method of reading and working from blueprints. The link to the plans is: https://www.diymontreal.com/product/drill-storage-and-charging-station-plans/
r/BeginnerWoodWorking: Community Support
The r/BeginnerWoodWorking subreddit offers a vibrant and supportive community for anyone tackling a drill charging station project, particularly those utilizing PDF plans. This online forum is a fantastic resource for seeking advice, sharing progress, and troubleshooting challenges encountered during the build process.
Members frequently discuss various drill charging station plans, offering insights into modifications, material choices, and construction techniques. Newcomers can post questions and receive guidance from experienced woodworkers, fostering a collaborative learning environment. Whether you’re struggling with cutting techniques, assembly, or electrical wiring, the community is readily available to provide assistance and encouragement. Creating an account allows you to connect with a world of woodworking enthusiasts and share your completed project!